Are you tired of repetitive tasks eating up your time? True intelligence isn’t about doing more work—it’s about designing systems that eliminate unnecessary work altogether. In this comprehensive guide, you’ll learn how to install, configure, and use the enterprise version of N8N, one of the most powerful and flexible automation platforms available. Discover how to create your own AI agents, automate processes, and save hours every week—either for free or at a very low cost!
What is N8N and Why Should You Use It?
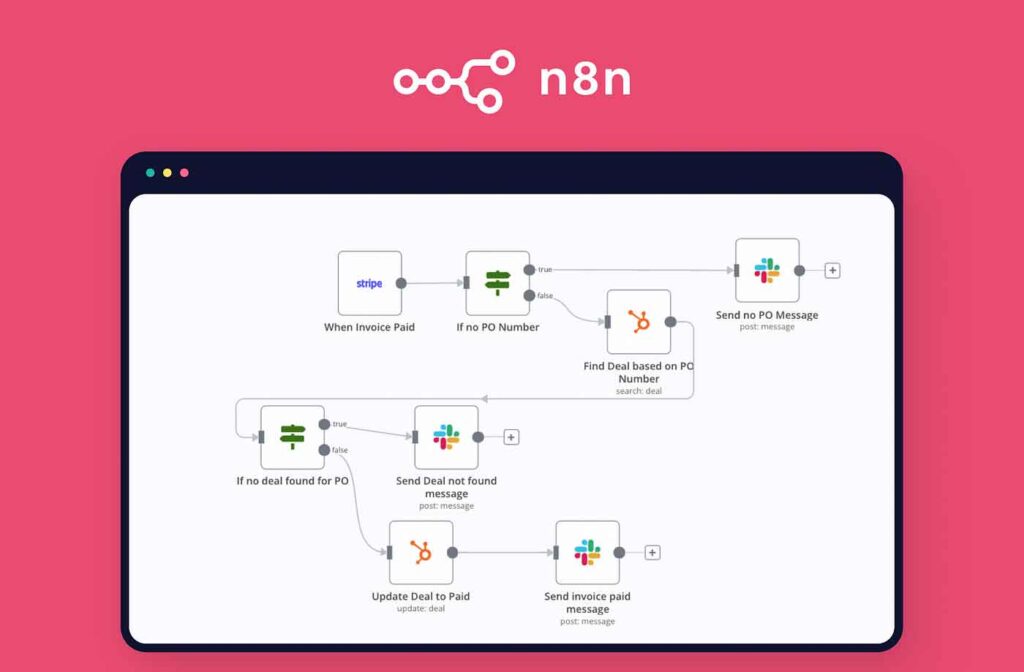
N8N is an open-source workflow automation tool that lets you connect over 400 apps and services, build custom workflows, and leverage artificial intelligence to handle tasks automatically. Think of it as a more flexible, self-hosted alternative to Zapier, with the added bonus of being free and unlimited if you host it yourself.
Key Benefits of N8N:
- Unlimited, free automation when self-hosted.
- Integrates with hundreds of platforms and services.
- Lets you build AI agents (like chatbots and virtual assistants).
- Easy-to-use visual interface—no coding required.
- Scalable and customizable for both businesses and personal projects.
Step 1: How to Install N8N Locally (Free & Unlimited)
1. Install Node.js
N8N runs on Node.js, so you’ll need to install it first:
- Visit the official Node.js website.
- Download the recommended version for your operating system (Windows, Mac, or Linux).
- Run the installer and follow the prompts.
2. Install N8N
Open your terminal (Command Prompt on Windows, Terminal on Mac/Linux) and install N8N globally using npm. The process is straightforward and only needs to be done once. Write the following command.
npm install n8n -g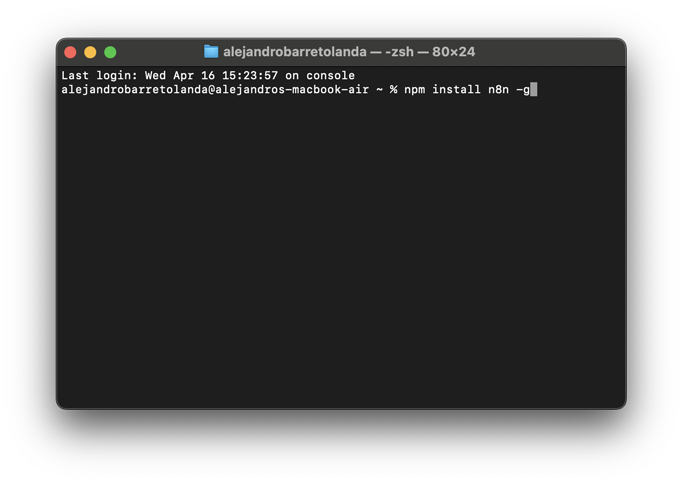
Probably you will get an error. If that happens, then write the following command.
sudo npm install n8n -g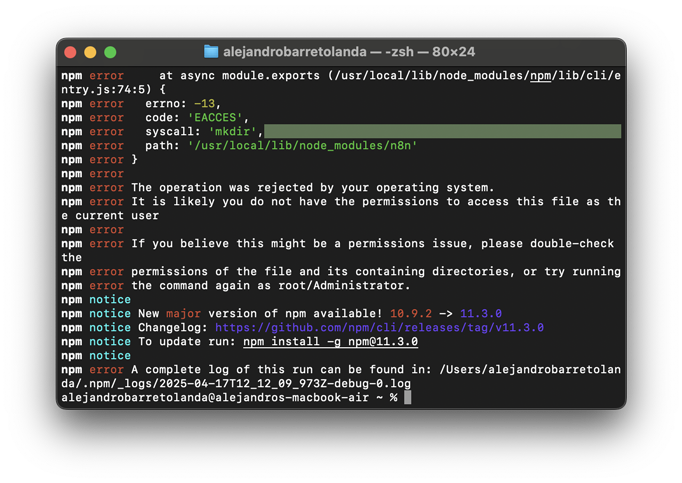
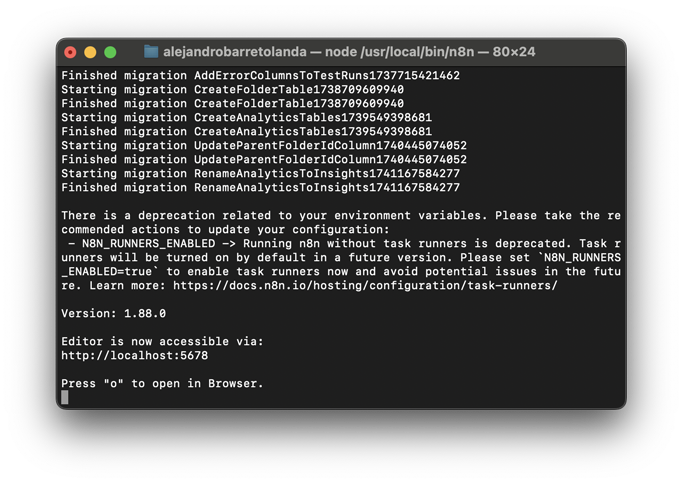
3. Start N8N
After this write the command «N8N», press enter and then open It localhost with «o». Use a browser that is not Safari, otherwise it won’t open.
It will provide a local URL (usually http://localhost:5678) where you can access the N8N dashboard in your browser.
4. Register and Unlock Pro Features for Free
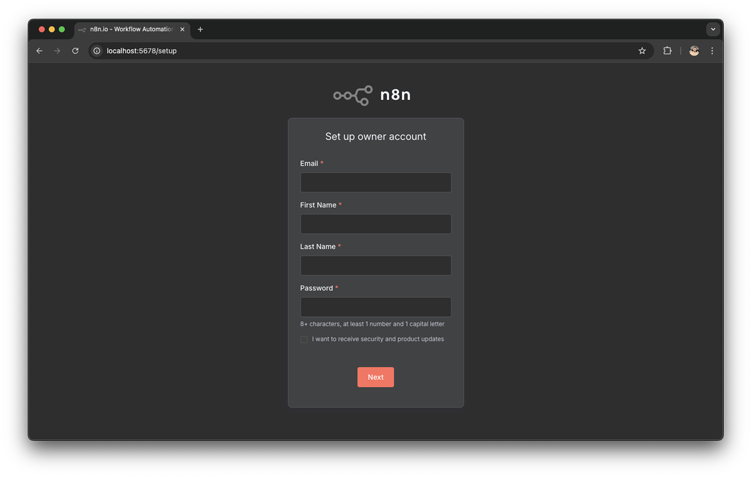
- Sign up with your email, name, and password.
- You’ll receive a free license key by email, unlocking advanced features like workflow history, advanced debugging, and folder organization.
- Enter the key in the “Usage & Plan” section to activate these features.
Step 2: How to Install N8N on a VPS (24/7 Automation & Professional Use)
If you want your automations to run around the clock, the best option is to install N8N on a Virtual Private Server (VPS). This way, your workflows keep running even when your computer is off, and you get better security and reliability.
1. Choose a VPS Provider
For this blog, we’re actually using Hostinger to host both our website and our N8N instance! Hostinger offers affordable, high-performance KVM servers that are perfect for running N8N.
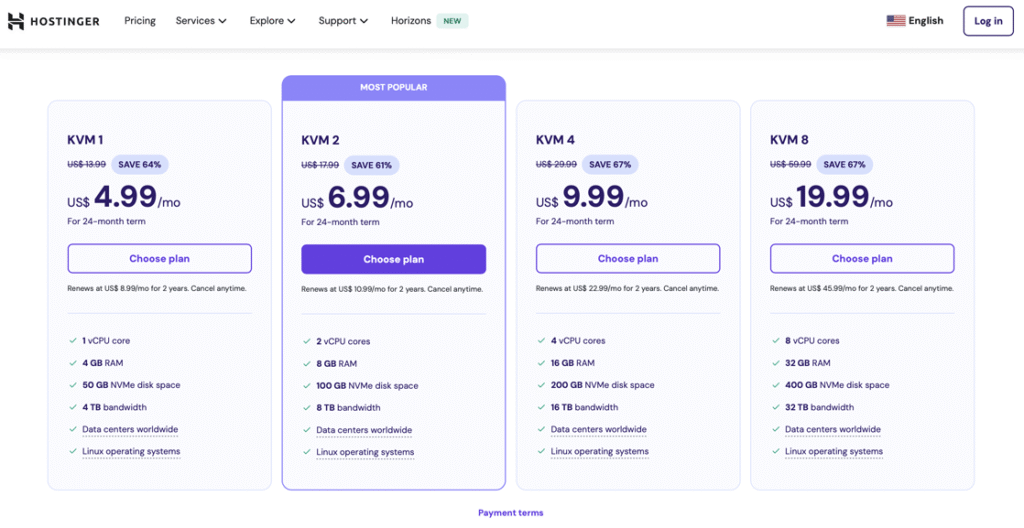
- Pick the plan that fits your needs (the mid-tier plan is usually more than enough).
- You can pay monthly or save more by choosing a longer billing cycle.
2. Set Up Your VPS
- Choose a server location close to you for better performance.
- Select N8N from the list of available applications during setup.
- Set a secure password and complete the configuration.
In just a few minutes, your server will be ready with N8N installed and accessible from anywhere.
3. Access and Configure N8N on Your VPS
- Log in to your VPS dashboard and access the N8N application.
- Register just like you did locally and request your free Pro license.
- You’re now ready to create professional automations and even invite team members to collaborate.
Step 3: Getting Started with N8N – Build Your First AI Agent
1. Create a New Workflow
- Click “Start from Scratch” or “Create workflow.”
- You’ll see a blank canvas where you can design your automation.
2. Add a Trigger
- Click the “+” button to add a trigger (for example, “Start chat” if you want to build a chatbot).
3. Connect an AI Agent
- Add a new node and select “AI Agent.”
- Choose your preferred AI model: OpenAI (ChatGPT), Gemini, Mistral, Anthropic, and more.
- Set up your credentials by pasting your API key from your chosen provider (for example, from the OpenAI platform).
4. Add Memory to Your Agent
- Add a memory node so your agent can remember the conversation history.
- For quick tests, you can use the simple memory option.
5. Personalize and Test Your Agent
- Click “Open chat” to test your chatbot.
- Send messages and see how it responds and remembers context.
Step 4: Embed Your N8N Chatbot on Your Website
- Activate your workflow by toggling the activation option.
- In the first node, select the option to share the chat publicly.
- Switch the mode to “Embed in another page.”
- Copy the integration code provided by N8N.
- Paste the code into your website’s HTML (either in the header or wherever you want the chatbot to appear).
- Make sure to update the webhook URL with the one from your N8N instance.
Personalize Your Chatbot:
You can easily change the chatbot’s name, language, and welcome message by editing the script. If you’re not comfortable with code, tools like ChatGPT or Gemini can help you customize the script based on the official N8N documentation.
Step 5: Explore Templates and Advanced Automations
N8N offers a huge library of ready-to-use workflow templates. You can automate things like:
- Google Calendar management
- Social media posting
- Blog updates
- Integrations with databases, spreadsheets, CRMs, and more
Just copy the template, paste it into your N8N dashboard, and set up your credentials.
SEO Tips for Your N8N Automations
- Use keywords like “task automation,” “N8N,” “install N8N,” “AI automation,” “N8N workflows,” and “AI chatbot.”
- Add screenshots and visuals of the installation and setup process.
- Link to related tutorials and the official documentation.
- Include a FAQ section to capture common user searches.
Frequently Asked Questions about N8N
Is N8N free?
Yes! You can use it for free and without limits if you self-host it locally or on your own server.
Do I need to know how to code to use N8N?
Nope! The visual interface makes it easy to build automations without any coding, though you can go deeper if you have technical skills.
Can I use N8N for business?
Absolutely. It’s scalable, supports multiple users, and offers advanced features for teams and companies.
Which AI models can I connect?
N8N supports OpenAI, Gemini, Mistral, Anthropic, DeepSeek, and many more.
Conclusion
Automating your tasks with N8N is easier than you think. Whether you run it locally or in the cloud, you can build smart agents, chatbots, and workflows that save you time and effort. Free yourself from repetitive work and focus on what truly matters.
Did you find this guide helpful? Leave a comment below and share this post so more people can discover the power of automation with N8N.